
Looking to backup your iPhone and iPad using iCloud or Finder? Here’s a complete step by step tutorial that will come in handy.
Learn to Backup Your iPhone and iPad Using iCloud and Finder to Keep Everything Nice and Safe at All Times
Keeping things backed up to a safe and secure location is always recommended. While it’s rare that an iPhone or iPad would stop working completely, it’s not unheard of. Timely backups ensure your cherished files, photos and videos stay safe at all times.
In today’s tutorial, I will walk you through the process of creating a backup of your iPhone and iPad using either iCloud or Finder. We will start with iCloud first since that is the simplest method of creating an iPhone and iPad backup. It doesn’t even require any cables, just an ample amount of storage and a working internet connection.
Backup iPhone and iPad Using iCloud
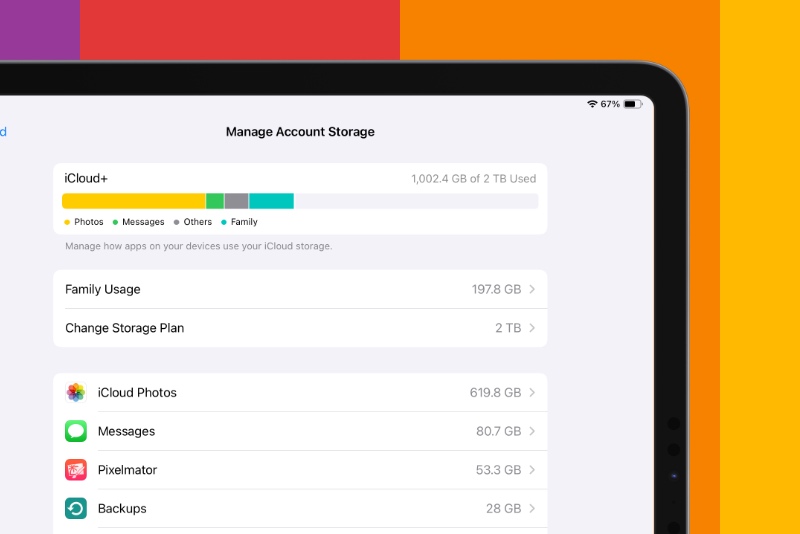
Since this method relies completely on iCloud storage, therefore you must have plenty of it in order to create a backup. The default 5GB of free storage will not cut it and I will recommend buying more storage. You can do this by going to Settings > Apple ID at the top > iCloud > Manage Account Storage. Tap on Change Storage Plan to get more storage.
Once you do have enough storage space on iCloud, go to Settings > Apple ID at the top > iCloud > iCloud Backup. Make sure the ‘Back Up This iPhone/iPad’ toggle switch is turned on. Also tap on ‘Back Up Now’ to start the backup immediately.
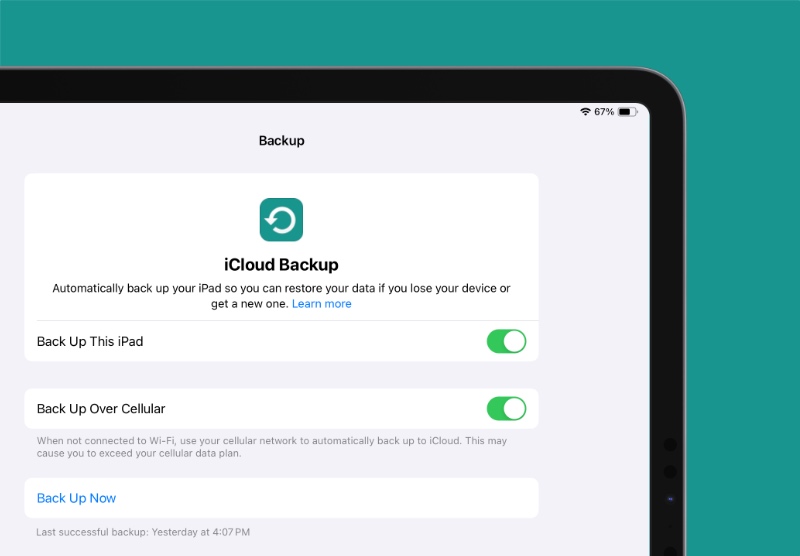
It’s as simple as that. Whenever you plug your iPhone and iPad to a wall charger, the operating system will create a backup in the background on its own, ensuring your files and settings remain safe and secure on Apple’s servers.
This was the easy method for creating a backup. Now let’s move on to Finder.
Backup iPhone and iPad Using Finder and iTunes
The steps for creating a backup on Finder might seem a little a little complicated at first but you’ll get the hang of it after the first try. Though I still recommend using the iCloud method for creating a backup, but the Finder method is completely free.
Step 1. Connect your iPhone or iPad to your Mac using a USB-C cable, or whichever cable is applicable for your device.
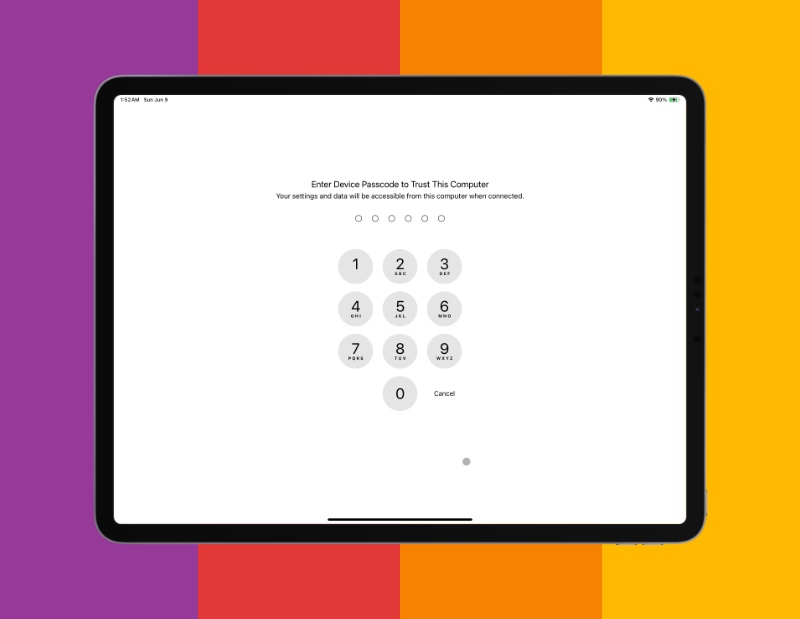
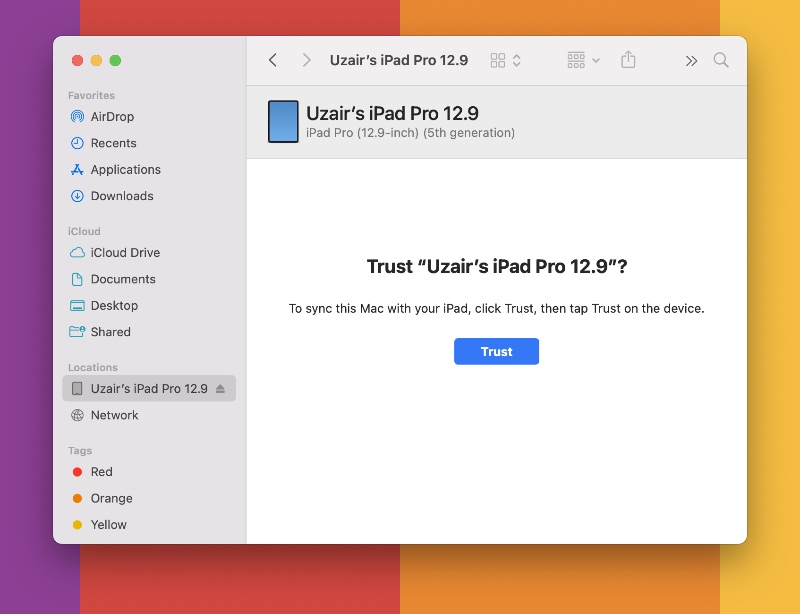
Step 2. Once connected, you will required to trust the computer you just connected to. Tap on Trust on your iPhone and iPad to continue and then enter your device’s passcode.

Step 3. Once done, launch Finder.
Step 4. Select your device from the list of available options on the left.
Step 5. Click on ‘Trust’ if you are connecting your device for the first time to your Mac.
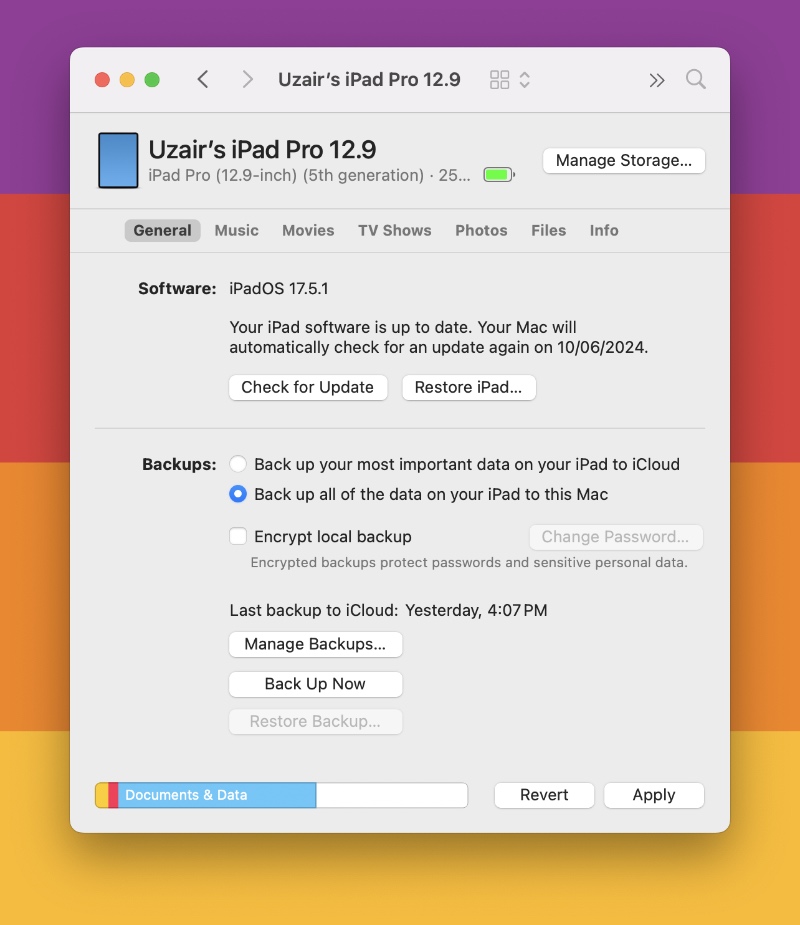
Step 6. Under the ‘Backups’ section, select the second option: Back up all of the data on your iPhone/iPad to this Mac.
Step 7. Now click on ‘Back Up Now.’
Now that you know how to create a backup, it’s best you do it often to keep everything nice and safe.