
Tomorrow is the big day, and here’s how you can prepare your iPhone and iPad for iOS 18 and iPadOS 18 beta in a few easy steps.
iOS 18 and iPadOS 18 Beta 1 is Set for Release Tomorrow – Here’s a Quick Checklist of Things to do Now in Order to Prepare Yourself
It’s the first day of WWDC 2024 tomorrow and a lot is about to happen. From dad jokes to new beta software, Apple is going to reveal it all in its day one keynote. If you’re reading this, it means you’re super excited for iOS 18 and iPadOS 18 beta updates for iPhone and iPad.
Trust me, so am I.
Before you get carried away in excitement tomorrow, I’m going to list down a few things – a checklist of sorts – which you should go through right now, if you’re planning to install the beta before your friends.
Ensure You Have a Compatible iPhone and iPad
Although it’s just a rumor, but it seems as though Apple is going to support devices going back all the way to iPhone XS, iPhone XR and iPhone 11. If you have an older iPhone on which you wish to test out iOS 18, you’re in for a treat.

On the iPad side of the fence, things are a little murky and so far it seems Apple isn’t dropping support for any device. It seems as though Apple will support every device which supports iOS 17 and iPadOS 17.
Again, there’s a chance Apple might actually end up dropping support for a device or two, so don’t be surprised at this.
Free up Some Space
It is highly recommended that you free up some space on your device to make room for the update, especially if you’re planning to install it over the air. Freeing up at least 15GB of space is strongly advised though you can get away with 10GB, but I wouldn’t risk anywhere near the latter.
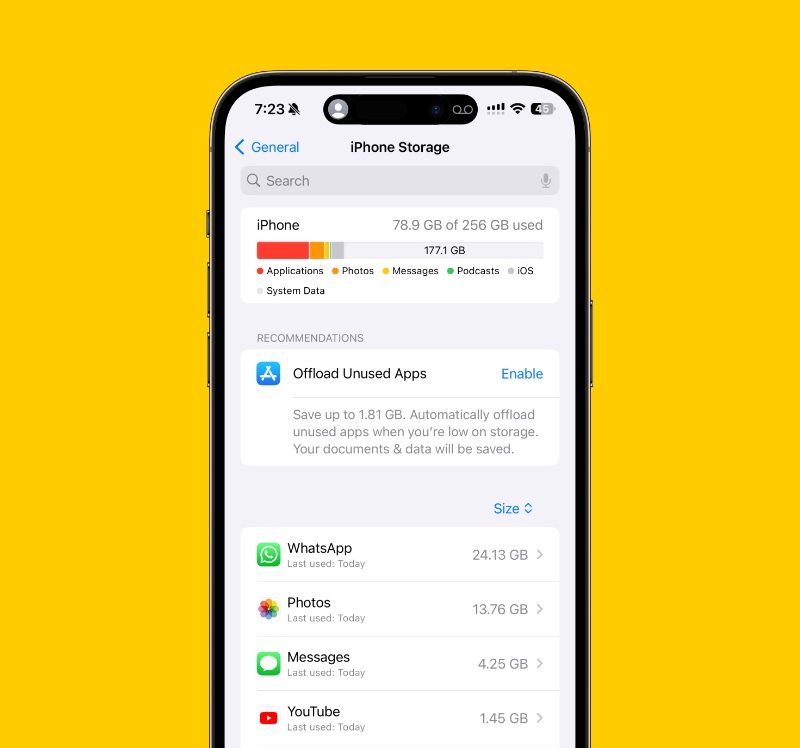
You can check how much free space there is left on your iPhone or iPad by going to Settings > General > iPhone/iPad Storage. Use this option to see which app is using the most amount of storage and get rid of what is unnecessary.
Backup Everything to iCloud or Finder
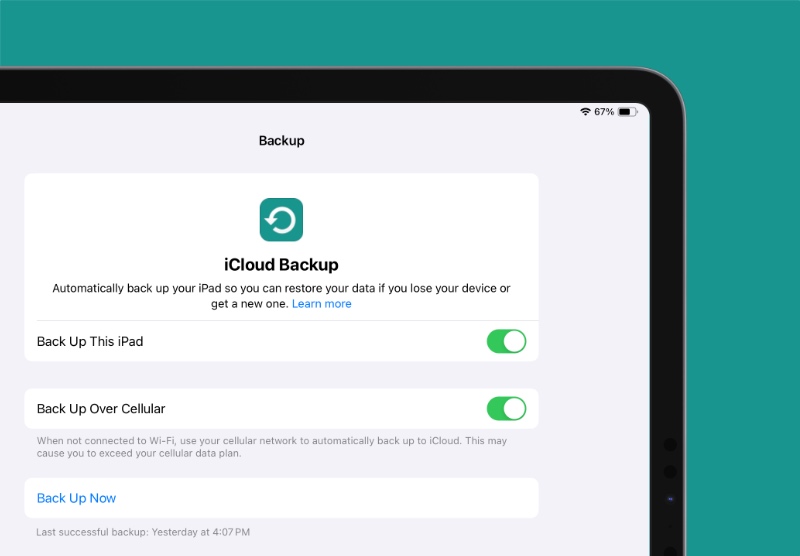
Take this time to backup your iPhone and iPad using iCloud or Finder. It barely takes a few minutes and I even wrote a guide about it here. If you already have a spare and empty iPhone and iPad in order to test out beta software, you can just skip this step completely, otherwise pay close attention to it. There’s no worse feeling than forgetting to create a backup and seeing everything go south.
You’ve been clearly warned.
Make Sure Your iPhone and iPad is Set to Receive Beta Updates
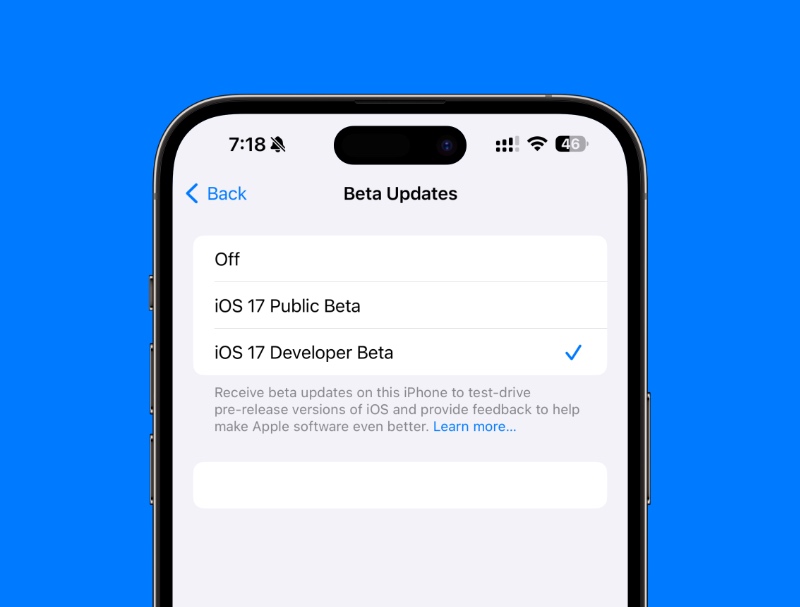
This is easy and a totally necessary one. On your device, go to Settings > General > Software Update > Beta Updates and select which beta update you wish to receive. It can be either developer or public.
Developer betas are released first, but chances of getting a botched update are high hence higher risk. Public betas tend to take a while to release and are usually rolled out when developer betas are fairly stable enough for use. It’s entirely up to you, but this step is necessary.
Personally, I would recommend selecting the public beta option. Rest is up to you.
Just in Case
Although these sort of updates are easy to download and install, but chances of things going wrong are never ever zero. Ensure you have your charging cable and adapter ready in case your battery is low and the update shows up. Make sure your home Wi-Fi is working flawlessly. Run a speed test or two to check check for reliability. Also make sure you have plenty of coffee ready in case you tire yourself from all the wait.


