Today I will show you how to use Text Effects in iMessage on your iPhone, iPad and Mac.
Make Your iMessage Conversations Super Fun and Creative with Text Effects on iPhone, iPad and Mac
iMessage started its journey with the launch of iOS 5 back in 2011. What started off in the most basic manner ever is now extremely feature-rich.
With iOS 18, iPadOS 18, and macOS Sequoia, iMessage allows you to add effects to your text if you want to get your point across in an extremely dynamic way.
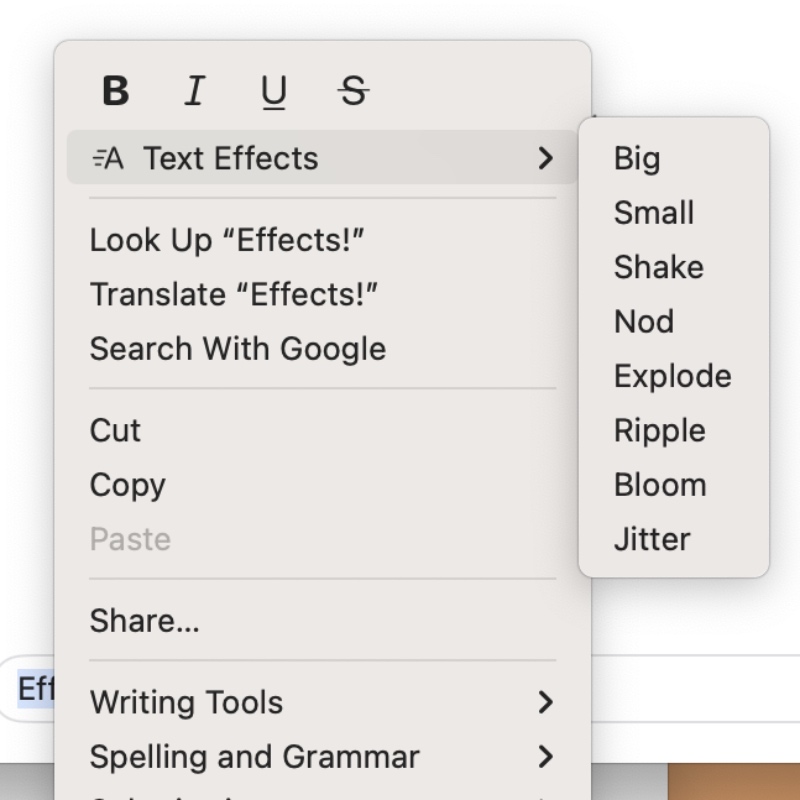
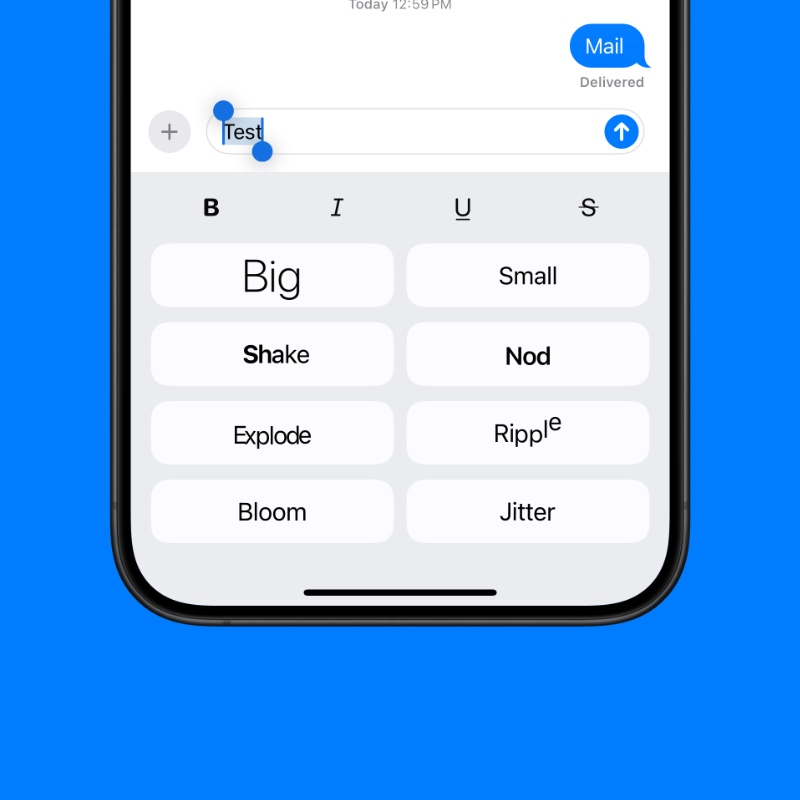
The effects include: Big, Small, Shake, Nod, Explode, Ripple, Bloom, and Jitter.
The cool thing about Text Effects is how you can add the effect to an individual character, word, or emoji. Once you know how to use it, you’ll be having a lot of fun with messaging.
Here’s how you use Text Effects on iPhone, iPad and Mac:
Step 1. Launch the ‘Messages’ app.
Step 2. Type a word. Any word at all.
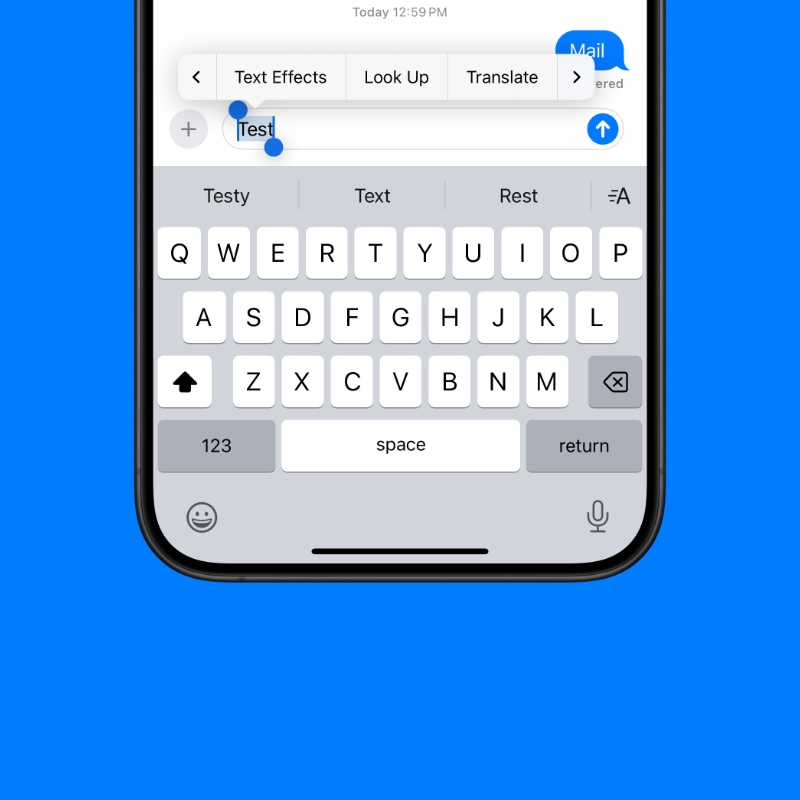
Step 3. ‘Double-tap’ on the word on iPhone or iPad or ‘right-click’ on it if you’re using a Mac.
Step 4. Go next in the row of options and you’ll see ‘Text Effects.’ Tap on it to open.

On the Mac, you’ll see the ‘Text Effects’ option up-front.

Step 5. Choose the effect you want to add to your text and send it away.

Once again, you can add multiple effects in a single message if you so like, allowing you to get extremely creative with what you’re typing. Give it a go, and you’ll be hooked.
As someone who loves to keep things nice and vanilla while texting, it’s still great to know that this option exists for times when I do want my words to jump around a little.
iMessage was really boring in the initial days of its release. You were limited to just sending text, photos and videos. You couldn’t customize your text, there was no support for third-party apps either.
Many years later, iMessage is finally on par with a lot of text messaging apps out there, like WhatsApp, Facebook Messenger, and so on.
There are a few features missing still. I’m sure Apple will slowly fill those voids with future iOS, iPadOS, and macOS updates.


