Here’s how you can delete all HomeKit Secure Video camera recordings using your iPhone, iPad, and Mac.
You Can Erase All Saved Video Recordings of a HomeKit Camera in Your Home or Office Using Your iPhone, iPad and Mac
For any reason at all, you want to delete the security footage from your HomeKit camera, you can do that using the Home app on your iPhone, iPad, and Mac.
Before I show you how to do it, please know that you cannot recover the deleted videos at all. Once you do this, everything is gone for good.
Here’s what you have to do in order to delete all HomeKit camera recordings:
Step 1. Launch the ‘Home’ app.
Step 2. Right at the top you’ll see the ‘Camera’ section. Select the camera whose recordings you want to delete.
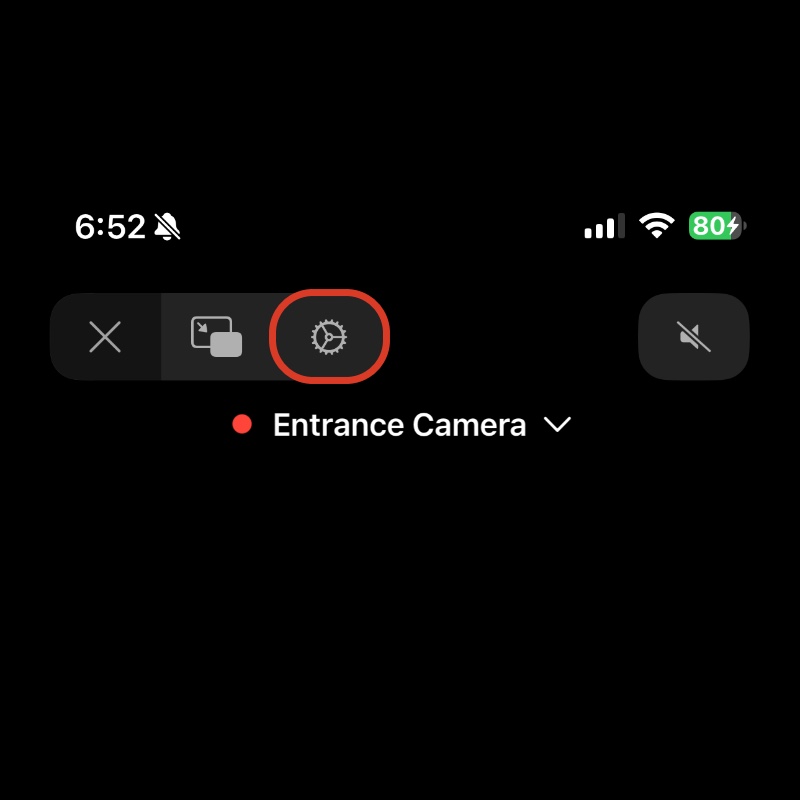
Step 3. Tap or click on the ‘Settings’ button on the top left.

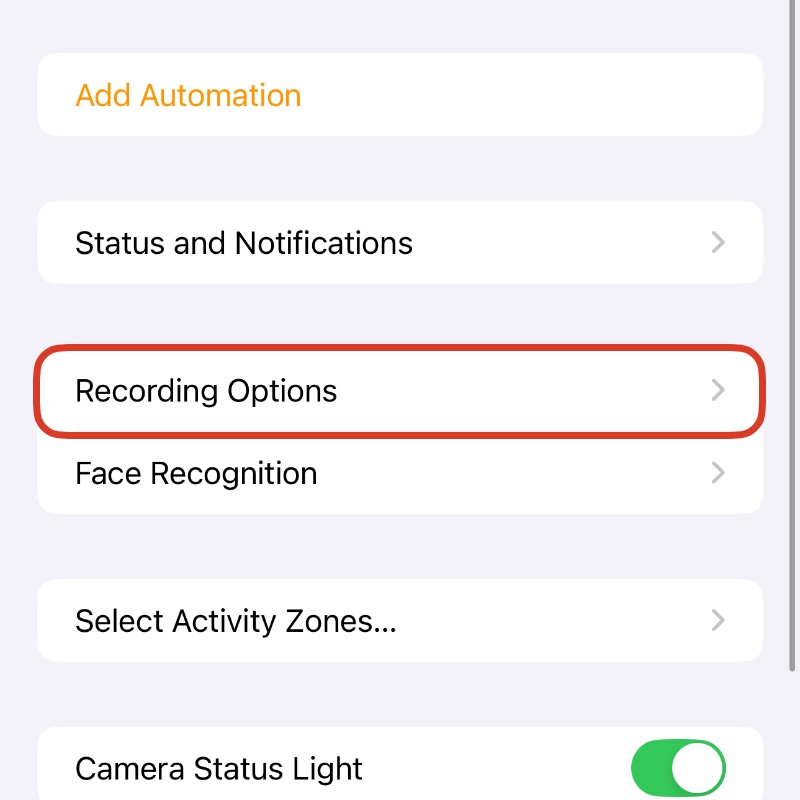
Step 4. Now open ‘Recording Options.’

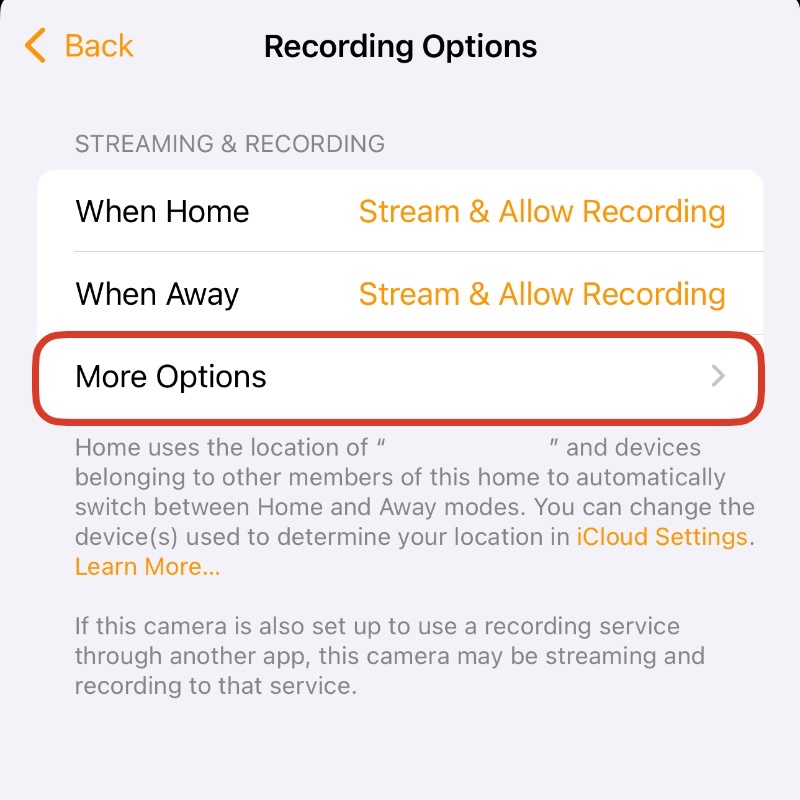
Step 5. Open ‘More Options.’

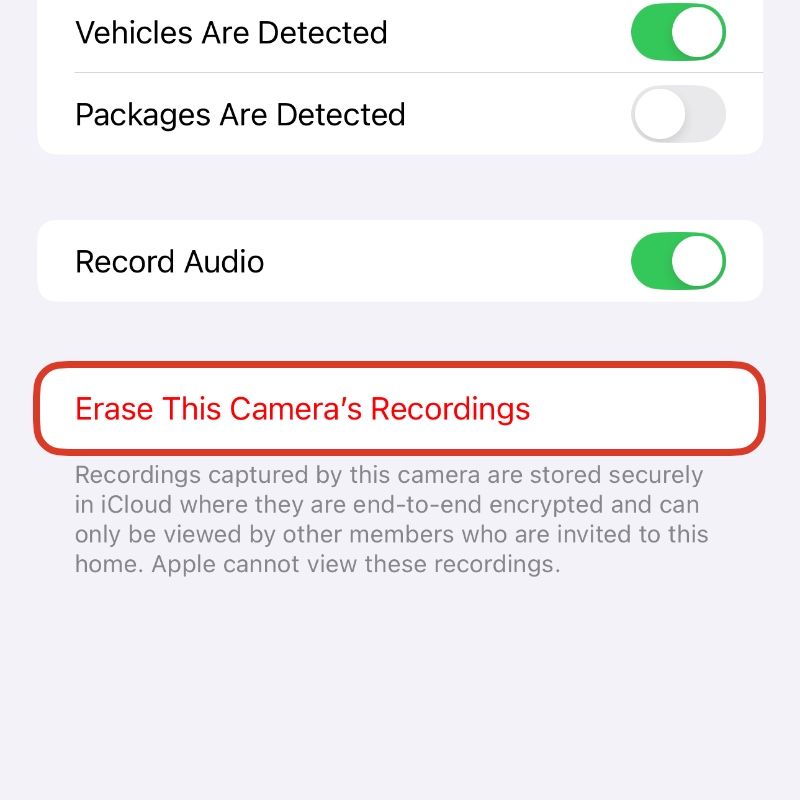
Step 6. Right at the bottom you’ll see ‘Erase This Camera’s Recordings.’ Tap on it. Again, this cannot be undone.

If you have multiple cameras, you have to repeat the above steps multiple times until all recordings are gone.
Looking to delete just one particular video only?
Tap on the camera that recorded the video, scroll through the timeline at the bottom, tap on the ‘Share’ button on the left, and then tap on the ‘trash can’ icon on the bottom right.


