Here’s how you can download and install new HomePod software updates using your iPhone and iPad.
Keep Your HomePod Up to Date and Learn to Download New Software Using the Home App on iPhone and iPad
HomePod receives software updates on a regular basis. These updates install automatically in the background, ensuring you get access to the latest features and changes without having to do anything at all.
However, do keep in mind these updates may take up to a couple of weeks to download and install. Sometimes, they install instantly the moment they are released.
If you have an iPhone or an iPad, you can manually check for updates for HomePod and download them too.
This means whenever you hear about a brand-new update, you can just download it instantly without waiting for anything.
Here’s what you need to do on your iPhone or iPad in order to download and install the latest HomePod software update:
Step 1. On your iPhone or iPad, launch the ‘Home’ app.
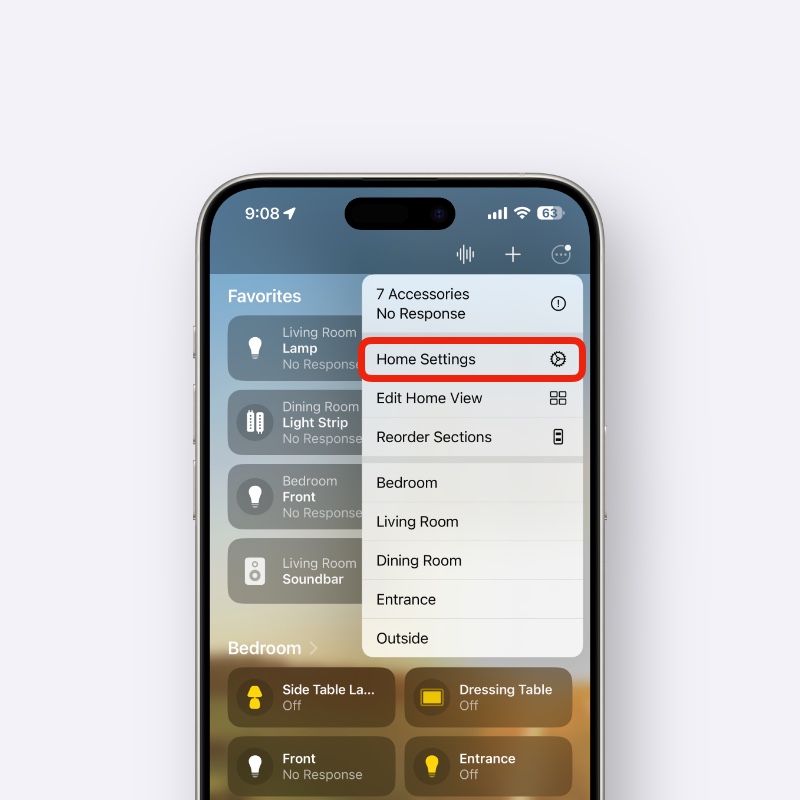
Step 2. At the top right of the Home app, you’ll see ‘three dots.’ Tap on it.
Step 3. Now tap on ‘Home Settings.’

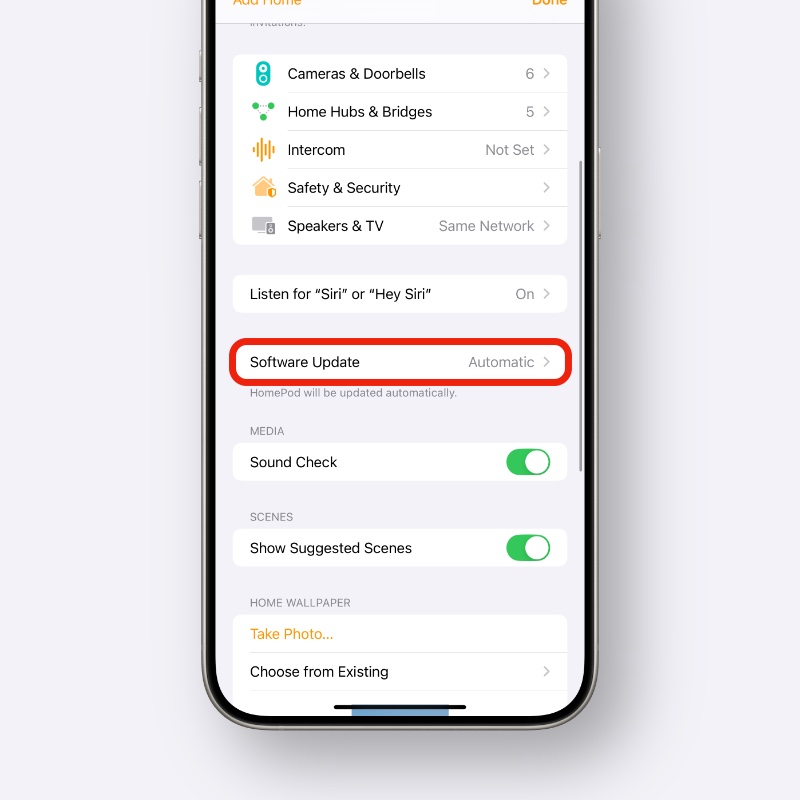
Step 4. Scroll down a little and find ‘Software Update’ and then tap on it to open.

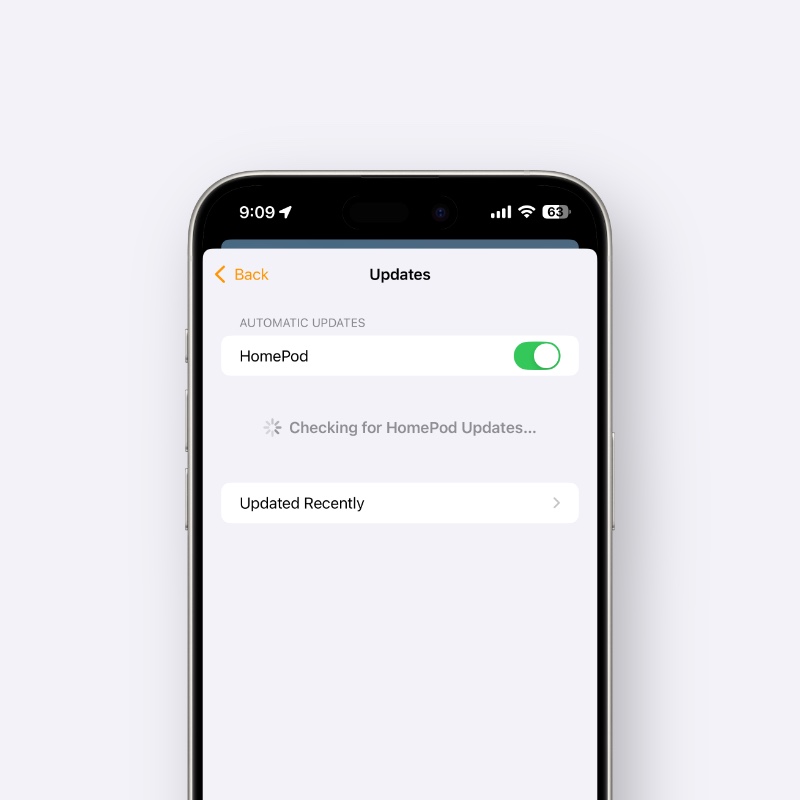
Step 5. As soon as you’re here, the Home app will start looking for new software updates.

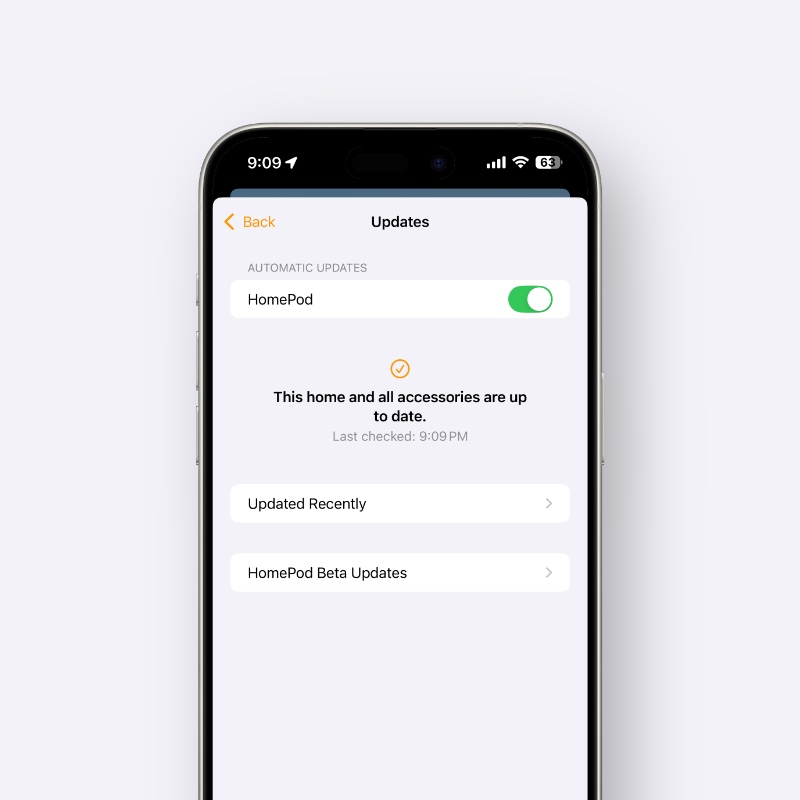
Step 6. If there’s a new update, you can install it immediately. If there isn’t any, you’ll see the message as shown in the screenshot below:

In order to know whether or not the update is being installed, just have a look at your HomePod and you should see a spinning animation at the top, indicating that software is being updated.
Although the HomePod downloads and installs software updates automatically, it’s still good to know how to manually perform an update when there’s a new one available.
Those who have been living the HomePod life for years already know this, but if you’re someone who just got a HomePod, you now know something new.


