
Today I will show you how you can disable security camera audio recording in HomeKit using your iPhone, iPad, and Mac.
Privacy Issues? Disable Audio Recording on Your HomeKit Security Camera in a Few Easy Steps
Adding a security camera to your home or office is crucial if you want to keep an eye on the important stuff.
If you’re well invested in HomeKit, then chances are you already have a camera or two at home. But you’ve realized something that may be invasive in terms of privacy.
By default, all cameras in HomeKit will record and stream audio along with video. That’s how it should be. However, in some cases, you might want to disable audio recording.
This is crucial in places if you have a camera in the living room, where someone might eavesdrop on important conversations. In that case, disable audio recording and keep everyone happy.
In this tutorial, I’ll show you how to do just that. And it takes under a minute on your iPhone, iPad or Mac.
Step 1. Launch the Home app on your iPhone, iPad or Mac.
Step 2. Find the camera whose audio you want to disable. Make sure you open the camera to view its live feed.
Step 3. At the top left, you’ll see the Settings icon. Click or tap on it to open.
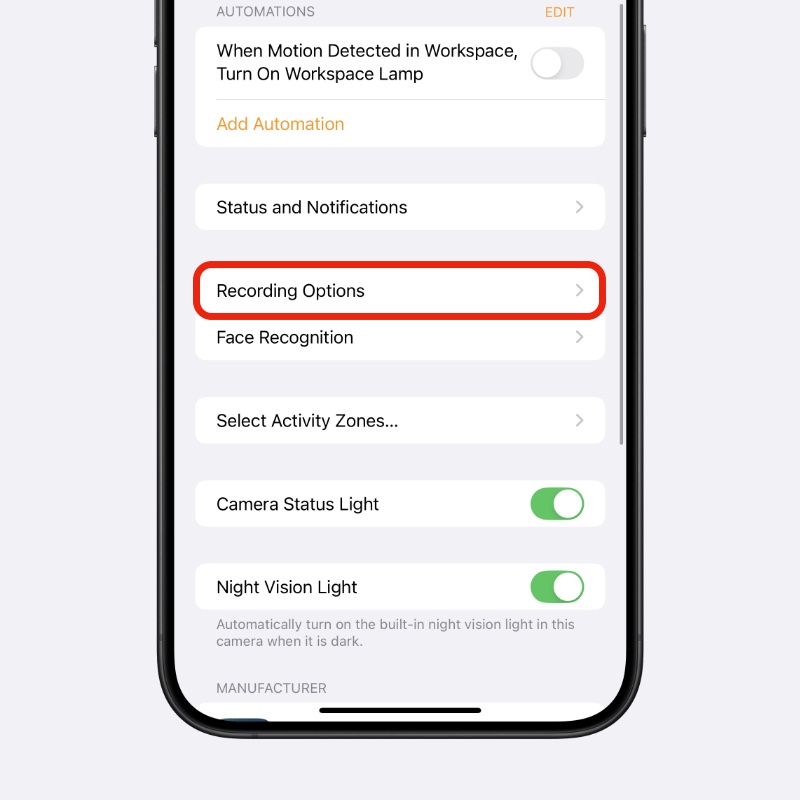
Step 4. Scroll down a little and you’ll see Recording Options. Open it.
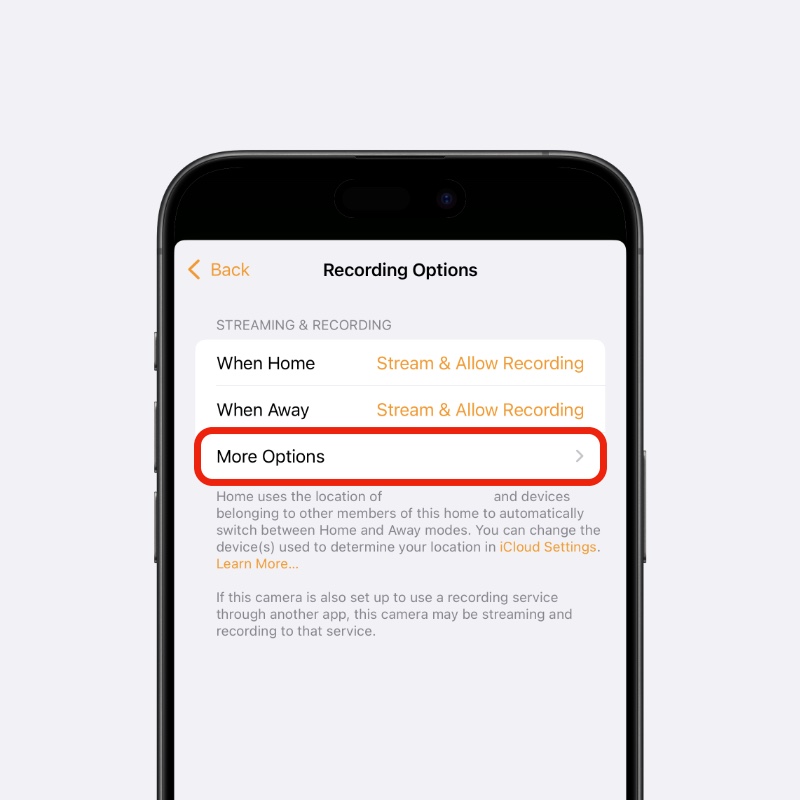
Step 5. Now open More Options.
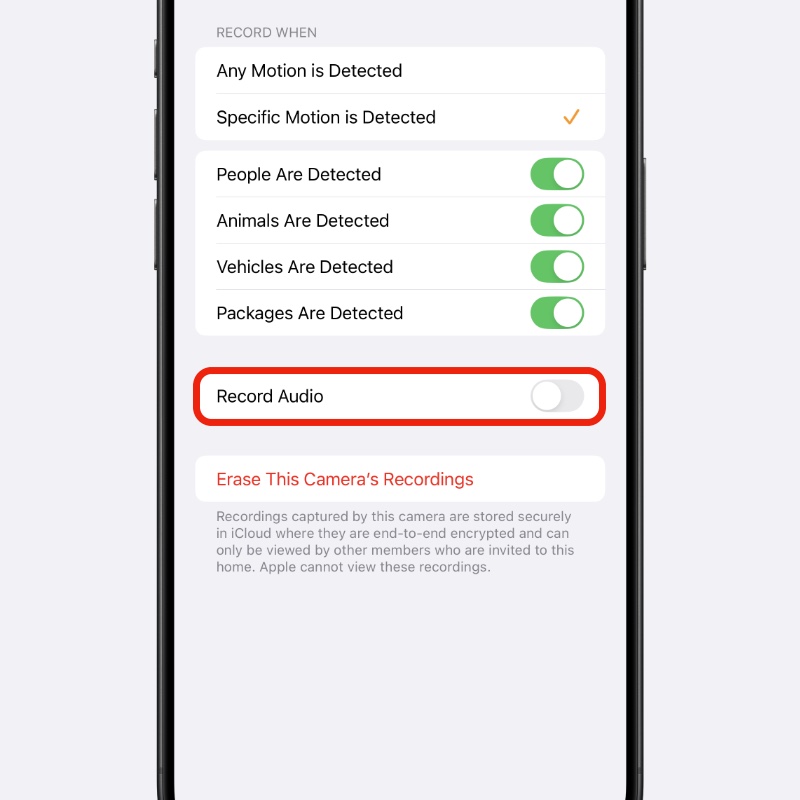
Step 6. Simply disable the Record Audio switch from here.
You’re done. From now on, audio won’t be streamed nor will it be recorded.
It’s a good idea to decide at the point of installing the camera where you want audio recording to be enabled and where it shouldn’t be. Places like the living room should be on mute. But cameras facing the front door should always record audio.
Anything outside the house should record audio all the time; there’s no exception.


