Today I’m going to show you how to completely disable Apple Intelligence on iPhone, iPad, and Mac devices.
Don’t Want Apple Intelligence Around? You Can Disable it Completely on Your iPhone, iPad and Mac
If you have one of the most recent iPhones or an iPad and Mac with Apple silicon, you might have experienced Apple Intelligence already.
It’s a huge upgrade to the iPhone, iPad, and Mac lineup, and it will keep getting better with time too.
However, AI doesn’t sit well with a lot of people. And if you believe you do not want any of it and wish to disable the feature completely, today I will show you how to do just that.
Disable Apple Intelligence in iOS and iPadOS
Let’s start things off on the iPhone and iPad first:
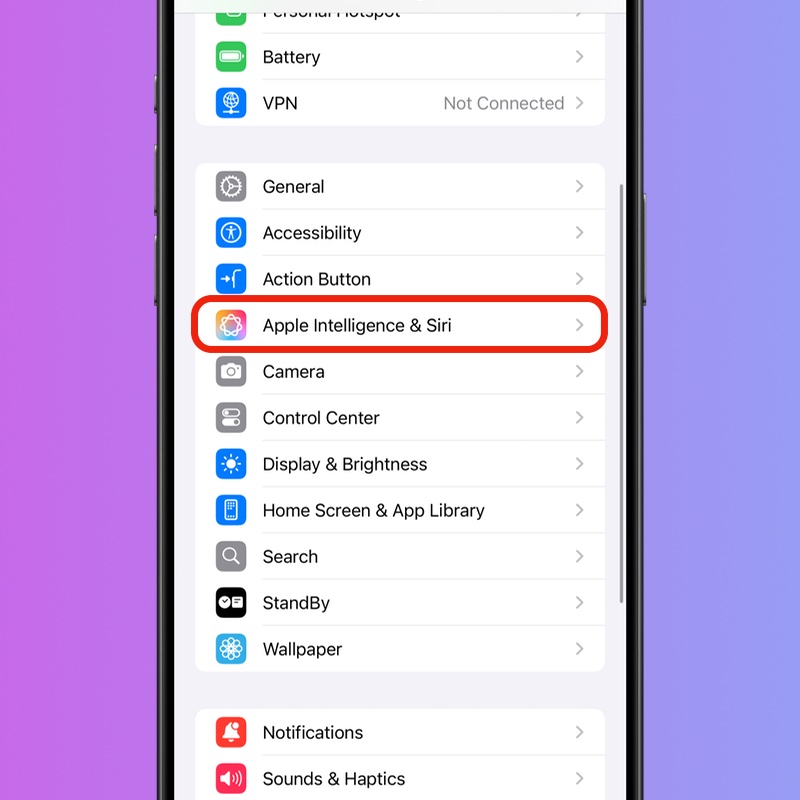
Step 1. Launch the ‘Settings’ app.
Step 2. Tap on ‘Apple Intelligence & Siri.’

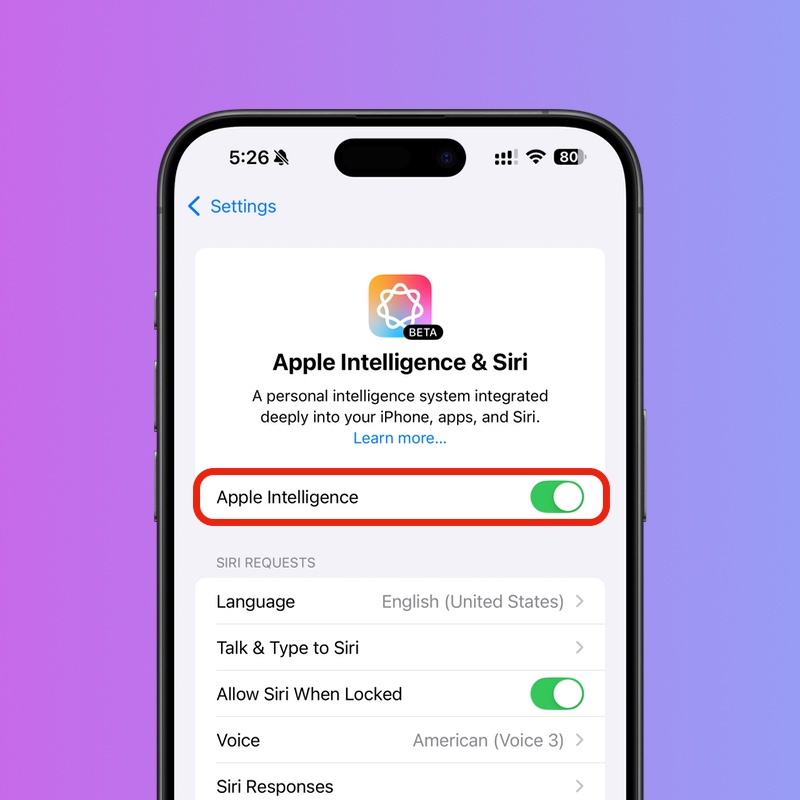
Step 3. Right at the top you’ll see the ‘Apple Intelligence’ toggle switch. Just turn it off.

Once you do this, you can confirm Apple Intelligence has been disabled by simply launching Siri. You’ll see the old Siri animation.
Disable Apple Intelligence in macOS
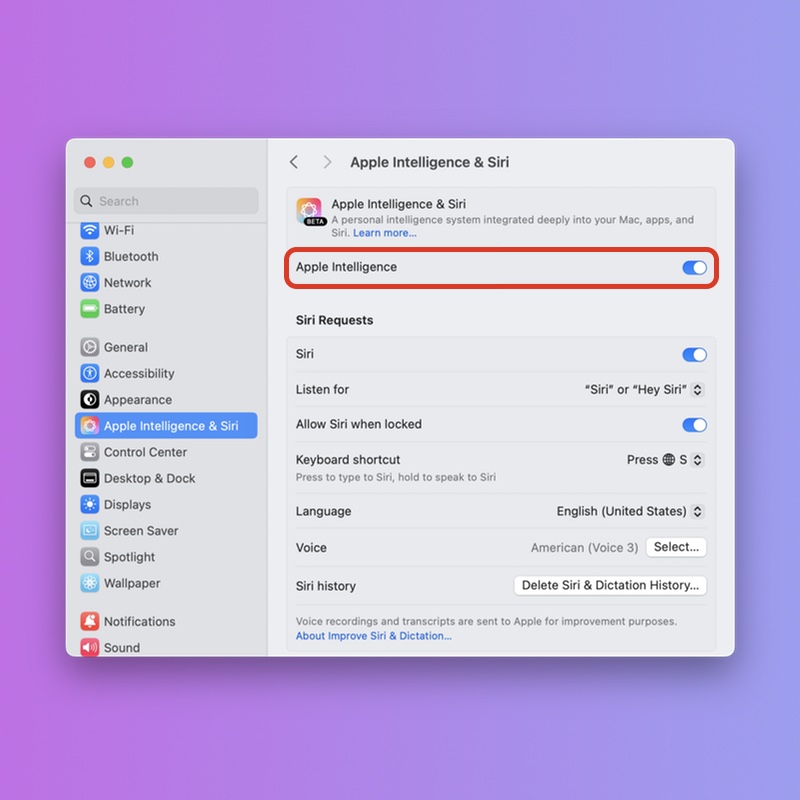
Step 1. Launch ‘System Settings.’
Step 2. Click on ‘Apple Intelligence & Siri’ on the left.
Step 3. Now just turn off the ‘Apple Intelligence’ toggle switch at the top.

Once you do this, you lose a lot of useful features, such as writing tools. If you’re on iOS 18.2, iPadOS 18.2, or macOS 15.2, you’ll lose the smarter Siri with ChatGPT integration as well.
Image Playground and Genmoji are also part of Apple Intelligence, therefore you won’t be able to use them as well.
However, you will gain one thing – 4GB of storage space. That’s the amount of space needed by Apple’s AI to run on-device. That is a lot of precious space for more apps, games, photos, videos, etc.
Whether or not you want to use AI is entirely up to you. If you’re not using it at all and someone enabled it on your device, I will suggest disabling it to free up some space. There’s no point in having something around if it’s just sitting around collecting dust.
If you are enabling Apple Intelligence for the first time, be sure to check out the tutorial posted here for iPhone and iPad, and here for Mac.


