Make your iPhone and iPad videos more professional by enabling the ‘Lock White Balance’ feature in Settings. Here’s how you do it.
Make Your iPhone and iPad Videos Look Consistent and Professional Using the ‘Lock White Balance’ Feature
Small things can make your videos instantly stand out from the rest and one of those things is white balance. The accuracy of colors being shown to the viewer really makes a night and day difference.
On devices like iPhone and iPad, white balance is smartly adjusted as you are shooting photos and videos. By default, the white balance keeps on readjusting itself when you are recording a video and panning through a scene.
The thing is, if the white balance keeps on readjusting throughout the video, it leaves a very bad look in the end. If there aren’t too many light related changes in your video, looking the white balance will give you a consistent look, ultimately leaving a great impression, too.
Thankfully, on iPhone and iPad, there is a dedicated switch to lock the white balance. But, that setting is not in the Camera app. Instead, it is hidden away in Settings.
Let me show you how you can enable it.
Step 1. Launch the ‘Settings’ app.
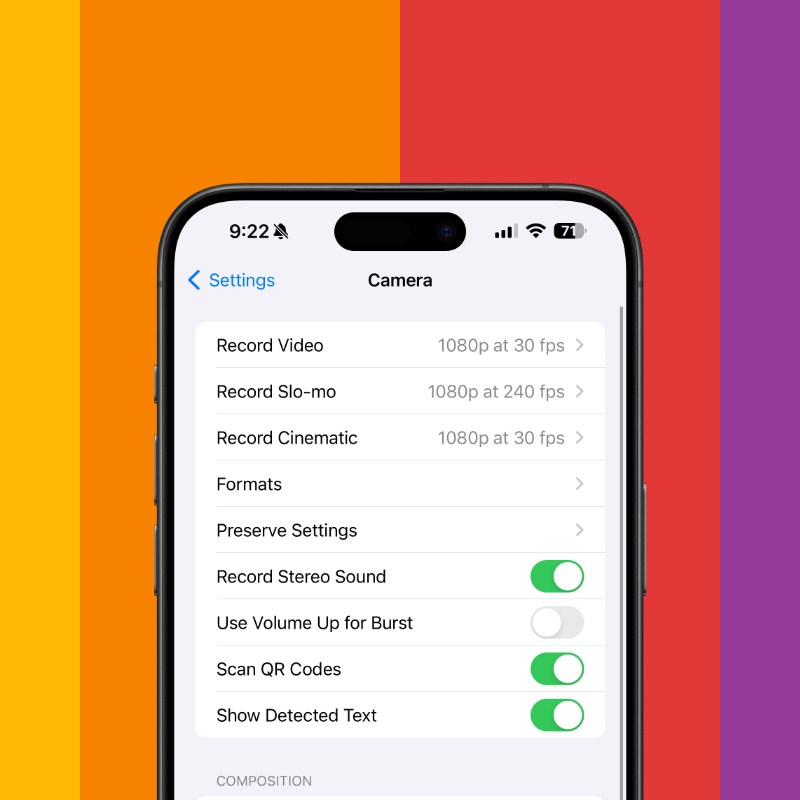
Step 2. Scroll down and find ‘Camera.’ Tap on it to open.
Step 3. Tap on ‘Record Video’ at the very top.

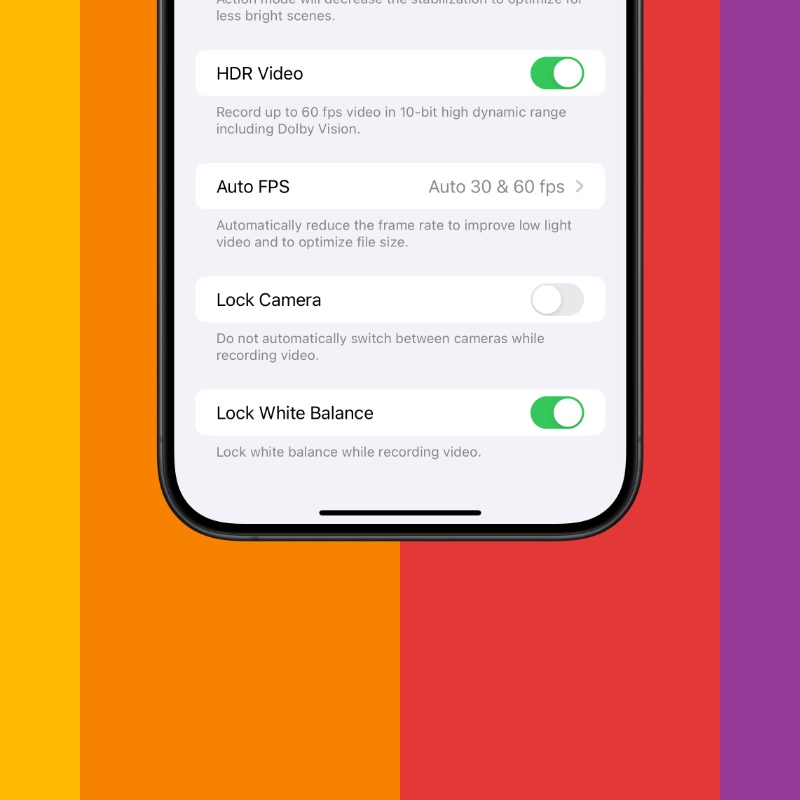
Step 4. Scroll all the way down and enable the ‘Lock White Balance’ toggle switch.

Now, launch the Camera app and start recording a video. The moment you press the record button, your iPhone or iPad will lock the white balance setting and keep it consistent throughout the video.
If you want perfect white balance every single time, start recording your video by first pointing your iPhone or iPad at a gray object and give it a second or two to adjust and then tap on record. This trick works for me every single time.
However, this setting actually might not work in situations where there are too many drastic scene changes, so plan accordingly if you want to leave the toggle switch on or off.


